GUI Framework API#
oasis::ui 네임스페이스 범주에서 호출됩니다.
헤더 파일#
OasisUI.h
초기화와 해제#
oasis::ui를 초기화하고 기본 Screen 객체를 생성합니다.
oasis::ui 초기화에 필요한 key-value map 입니다.
- 0: 성공
- -1: 실패
oasis::ui 초기화에 필요한 key-value map은 아래와 같습니다.
oasis::initialize에서 이 키값을 이미 지정할 경우, 덮어 씁니다.oasis::initialize에서 이 키값을 이미 지정할 경우, 덮어 씁니다.oasis::display::setup API로 설정됩니다.Note
hide-unmanaged-ui-layer 와 hide-unmanaged-ui-layers 키 둘 다 지정될 경우, hide-unmanaged-ui-layers를 사용합니다.
칩셋의 디스플레이 모듈은 용도 별로 여러 개 채널과 각 채널 별로 여러 개 레이어를 지원합니다. 최소 한개 채널과 한개 레이어를 지원합니다.
Oasis는 칩셋별 디스플레이 모듈이 지원하는 레이어 구조에 맞도록 GUI단을 HLAYER로 구분하여 관리합니다.
HLAYER는 32-비트 정수값으로 (channel, hard layer, soft layer)를 요소로 하는 3-tuple 구조를 갖습니다. 칩셋에 따라 (channel, layer) 구조를 갖을 경우, HLAYER 문자열 양식은 "0:1"와 같이 2-tuple로 지정합니다. 예를 들어, Display 제어를 담당하는 코어가 여러 개 있을 경우, channel은 0, 1, 2 등으로 코어 인덱스를 지정하며, hard layer는 각 코어에서 지원하는 레이어를 지정하고, soft layer는 Oasis가 필요에 따라 생성하는 구조를 가질 수 있습니다.
Touch calibration 데이터 값은 터치하여 얻은 5개 포인트를 이용하여 아래 함수에서 처럼 계산됩니다.
struct {
  int32_t x;
  int32_t y;
} touch[5] = { 0, };

int32_t cal[9] = { 0, };

void calibrate()
{
    double dx_min, dy_min, dx_max, dy_max;
    double dx_ratio, dy_ratio, scale = 65536.0;
    int32_t i;

    double x_distance = 0.0, y_distance = 0.0;

    x_distance += (double)(touch[4].x-touch[0].x);
    x_distance += (double)(touch[4].x-touch[3].x);
    x_distance += (double)(touch[1].x-touch[4].x);
    x_distance += (double)(touch[2].x-touch[4].x);
    x_distance /= 4.0;
    dx_ratio = (double)(screen[4].x-screen[0].x)/x_distance;

    y_distance += (double)(touch[4].y-touch[0].y);
    y_distance += (double)(touch[4].y-touch[1].y);
    y_distance += (double)(touch[3].y-touch[4].y);
    y_distance += (double)(touch[2].y-touch[4].y);
    y_distance /= 4.0;
    dy_ratio = (double)(screen[4].y-screen[0].y)/y_distance;

    dx_min = dx_max = 0.0;
    dy_min = dy_max = 0.0;

    for(i=0; i<5; i++) {
        dx_min += (double)touch[i].x - (double)screen[i].x/dx_ratio;
        dx_max += (double)touch[i].x + (double)(width_-screen[i].x)/dx_ratio;
        dy_min += (double)touch[i].y - (double)screen[i].y/dy_ratio;
        dy_max += (double)touch[i].y + (double)(height_-screen[i].y)/dy_ratio;
    }
    dx_min /= 5.0;
    dy_min /= 5.0;
    dx_max /= 5.0;
    dy_max /= 5.0;

    cal[0] = (int32_t)dx_min;
    cal[1] = (int32_t)dx_max;
    cal[2] = (int32_t)dy_min;
    cal[3] = (int32_t)dy_max;
    cal[4] = (int32_t)(dx_ratio*scale);
    cal[5] = (int32_t)(dy_ratio*scale);
    cal[6] = (int32_t)scale;
    cal[7] = 480;  //display width
    cal[8] = 320;  //display height
}

size_t save(const char *path)
{
    FILE *f = fopen(path, "w");
    if(!f) {
        return 0;
    }

    char cal_buffer[256];
    ssize_t len = sprintf(cal_buffer,"%d %d %d %d %d %d %d %d %d",
            cal[0], cal[1], cal[2], cal[3], cal[4], cal[5], cal[6], cal[7], cal[8]);
    fwrite (cal_buffer, 1, len, f);
    fclose(f);

    return len;
}
터치 이벤트가 발생하여 얻는 물리적 (x,y) 좌표값은 아래 함수에서 처럼 GUI가 사용하는 Screen 좌표로 변환됩니다.
struct {
  int32_t x;
  int32_t y;
} ui_touch;

void touchToScreen(int32_t x, int32_t y)
{
    ui_touch.x = (x - cal[0])*cal[4]/cal[6];
    ui_touch.y = (y - cal[2])*cal[5]/cal[6];
}
아래는 초기화 예제입니다.
oasis::key_value_map_t parameters;

parameters["system-font-size"] = "11";
parameters["system-font-path"] = "/mnt/sd/NanumGothicCoding.ttf";
parameters["display-rotation"] = "0";
parameters["enable-touch"] = "1";
parameters["touch-cal-data-path"] = "/mnt/sd/cal.dat";

parameters["vi0-hlayer"] = "1:0:0";
parameters["fb0-hlayer"] = "1:1:0";
parameters["hide-unmanaged-ui-layer"] = "1:2:0";

ui::setup(parameters);
아래는 Display를 270도로 회전하여 사용할 경우, 초기화 예입니다.
////////////////////////////////////////////////////////////////////////////////////////////
// display setup
parameters.clear();

parameters["memory-type"] = "ion"; //cma
parameters["screen-width"] = "720";
parameters["screen-height"] = "1920";

display::setup(parameters);


//////////////////////////////////////////////////////////////////////////////////////////
// ui setup
parameters.clear();

parameters["system-font-size"] = "10";
parameters["system-font-path"] = "/mnt/sd/consola.ttf";

parameters["display-rotation"] = "270";
parameters["enable-touch"] = "0";

parameters["fb0-hlayer"] = "0:1:0";
parameters["vi0-hlayer"] = "0:0:0";

err = ui::setup(parameters);
if (err < 0) {
  DLOG(DLOG_ERROR, "Oasis ui::setup failed\n");
  return -1;
}
/dev/disp 와 같이 device node tree에 노출하였을 경우, 해당 장치 드라이버 핸들을 리턴합니다.
hlayer_t 타입의 정수형으로 변환합니다.
hlayer_t로 변환된 값을 리턴합니다. 포맷이 틀릴 경우, -1을 리턴합니다.
Note
stringToHlayer API는 oasis::ui가 아닌 oasis 네임스페이스에 존재합니다.
Screen#
ui::setup이 성공할 경우, 기본 Screen 객체를 리턴합니다. 실패했을 경우, nullptr을 리턴합니다.
getDefaultScreen으로 얻은 Screen 객체입니다.
- 0: 성공
- -1: 실패
getDefaultScreen으로 얻은 Screen 객체입니다.
- 0: 성공
- -1: 실패
getDefaultScreen으로 얻은 Screen 객체입니다.
getDefaultScreen으로 얻은 Screen 객체입니다.
getDefaultScreen으로 얻은 Screen 객체입니다.
getDefaultScreen으로 얻은 Screen 객체입니다.
getDefaultScreen으로 얻은 Screen 객체입니다.
true를 리턴합니다. 비활성화된 경우 false를 리턴합니다.
getDefaultScreen으로 얻은 Screen 객체입니다.
true를 리턴합니다. 유효하지 않으면 false를 리턴합니다.
getDefaultScreen으로 얻은 Screen 객체입니다.
true를 리턴합니다. 실패했을 경우 false를 리턴합니다.
true를 리턴합니다. 닫혀있으면 false를 리턴합니다.
- 0: 성공
- -1: 실패
- 0: 성공
- -1: 실패
true이면 활성화하고, fasle이면 해당 플그래 값을 해제합니다.
플래그는 아래 값과 같습니다.
enum UIDevelFlags : uint64_t {
    kUIDevelFlag_Border = 0x0000000000000001ull,
    kUIDevelFlag_PrintCallStackOnLayout = 0x0000000000000002ull
};
kUIDevelFlag_Border는 각 widget의 border를 그립니다. kUIDevelFlag_PrintCallStackOnLayout 값은 사용하지 않습니다.
Widget#
윗제의 기본 클래스 이름은 아래와 같습니다.
| Widget 객체 | 클래스 이름 |
|---|---|
| Button | Button |
| Dialog | Dialog |
| DrawingArea | DrawingArea |
| FixedLayout | Fixed |
| GridLayout | Grid |
| BoxLayout | Box |
| SingleLayout | Single |
| Image | Image |
| Label | Label |
| ListBox | ListBox |
| Window | Window |
ui::setID로 Widget에 ID 문자열을 설정할 경우, 클래스 이름은 <클래스 이름>::<ID 문자열> 로 변경됩니다.
SizeRequestMode 값은 아래와 같습니다.
| SizeRequestMode | 값 | 설명 |
|---|---|---|
| kSizeRequestHeightForWidth | 0 | Widget은 너비를 알고 있는 상태에서 선호하는 높이를 계산합니다. |
| kSizeRequestWidthForHeight | 1 | Widget은 높이를 알고 있는 상태에서 선호하는 너비를 계산합니다. perferredWidth를 호출할 경우, Container Widget은 우선 perferredHeight를 호출하여 Widget의 높이를 안 다음, preferredWidthForHeight를 호출합니다. |
| kSizeRequestConstantSize | 2 | Widget은 Container Widget의 어떠한 크기 계산 요청에 응답할 수 있습니다. 이 경우 Container Widget은 preferredWidth와 perferredHeight를 우선 요청합니다. |
Note
그리기 영역은 Widget에서 margin 과 padding 크기를 제외한 영역입니다.
- true: 키 값이 있습니다.
- false: 키 값이 없습니다.
true이면 Widget을 보이도록 하고, false이면 Widget을 숨깁니다.
- true: 보이도록 설정된 상태입니다.
- false: 보이지 않도록 설정된 상태입니다.
true이면 다시 그립니다.
true이면 다시 그립니다.
true이면 다시 그립니다.
가로/세로 맞춤 값은 아래와 같습니다.
| AlignType | 값 | 설명 |
|---|---|---|
| kAlignFill | 0 | Widget을 꽉 채웁니다. 세로 맞춤의 경우, 높이를 확장합니다. 가로 맞춤의 경우, 너비를 확장합니다. |
| kAlignStart | 1 | Widget을 시작 위치에 맞춥니다. 세로 맞춤의 경우, 상단에 배치합니다. 가로 맞춤의 경우, 왼쪽에 배치합니다. |
| kAlignEnd | 2 | Widget의 끝 위치에 맞춥니다. 세로 맞춤의 경우, 하단에 배치합니다. 가로 맞춤의 경우, 오른쪽에 배치합니다. |
| kAlignCenter | 3 | Widget을 중앙 위치에 맞춥니다. |
| kAlignBaseline | 4 | 세로 맞춤에 한하여, Widget의 Container의 baseline에 맞춥니다. |
- 0: 성공
- -1: 실패
raf_bind_t는 아래와 같이 정의되어 있습니다.
DrawArea Widget에 애니메이션 그리기를 하려면 아래와 같은 방식으로 구현합니다.
// Player라는 객체에서 DrawingArea를 생성하고 여기에 rAF를 요청합니다.
int32_t Player::startDrawPictures()
{
    std::function<void(ui::WidgetRef,GraphicContextRef)> canvas_draw_bind = std::bind(&Player::draw, this, std::placeholders::_1, std::placeholders::_2);
    ui::DrawingAreaRef canvas = ui::createDrawingArea(canvas_draw_bind);
    ui::setID(canvas, "picture_canvas");
    ui::boxPackStart(vbox, canvas, true, true, 0);
    ui::requestAnimatedFrame(canvas, canvas_draw_bind);
}

void Player::draw(ui::WidgetRef widget, GraphicContextRef gc)
{
    Rect rect;
    ui::getCanvasRect(widget, rect);

    //그리기를 진행합니다.

    if(!completed_) {
        //필요에 따라 다시 rAF를 진행합니다.
        std::function<void(ui::WidgetRef,GraphicContextRef)> canvas_draw_bind = std::bind(&Player::draw, this, std::placeholders::_1, std::placeholders::_2);
        ui::requestAnimatedFrame(widget, canvas_draw_bind);
    }
}
true이면 로그를 활성화하고, false이면 로그를 해제합니다.
true이면 자식 Widget에도 적용됩니다. false이면 자식 Widget에게는 적용되지 않습니다.
true이면 플래그 값이 설정되고, false이면 플래그 값이 해제됩니다. 플래그 값은 setDevelFlags API를 참조합니다.
true이면 자식 Widget에도 적용됩니다. false이면 자식 Widget에게는 적용되지 않습니다.
Container Interface#
Oasis GUI는 아래 레이아웃 컨테이너를 이용하여 자식 Widget을 레이아웃 합니다:
- 수직 또는 수평 방향으로 배치하는
Box컨테이너 위젯 - 고정 위치에 배치하는
Fixed컨테이너 위젯 - 그리드 방식으로 줄과 열을 지정하여 배치하는
Grid컨테이너 위젯 - 단일 자식 위젯만 가지는
Single컨테이너 위젯 - 리스트 스타일로 스크롤링이 가능한
ListBox컨테이너 위젯
이들은 Container Interface에서 유도된 Widget 입니다.
Container Widget은 다른 Container Widget을 포함할 수 있습니다.
createBox, createFixed, createGrid, createWindow, createButton, createListBox 등으로 Container 인터페이스를 생성합니다.
Box Container#
Box 컨테이너 위젯은 자식 위젯들을 가로 방향 또는 세로 방향으로 배치합니다.
ui::kOrientationVertical 또는 ui::kOrientationHorizontal 값을 입력합니다. ui::kOrientationVertical는 위에서 아래 방향으로 자식 위젯을 배치하고, ui::kOrientationHorizontal는 왼쪽에서 오른쪽으로 자식 위젯을 배치합니다.
true를 설정하면 자식 위젯이 균일한 크기를 갖습니다. ui::kOrientationVertical의 경우, 높이가 균일하고, ui::kOrientationHorizontal의 경우, 너비가 균일합니다.
createBox로 생성한 Box 컨테이너 위젯입니다.
boxPackStart 로 추가된 Widget이 있다면 바로 다음 위치에 추가 됩니다.
createBox로 생성한 Box 컨테이너 위젯입니다.
ui::kOrientationVertical 방향으로 배치할 경우, 높이를 확장합니다.. ui::kOrientationHorizontal 방향으로 배치할 경우, 너비를 확장합니다. 여러 개의 자식 위젯의 expand 특성이 true인 경우, 그러한 자식 위젯들끼리 크기에 비례하여 확장됩니다.
ui::kOrientationVertical 방향으로 배치할 경우, 높이를 채웁니다. ui::kOrientationHorizontal 방향으로 배치할 경우, 너비를 채웁니다. fill이 false인 경우, Widget의 Align 특성 값에 맞게 배치됩니다. expand가 true 인 경우에만 적용됩니다.
padding 값을 합한 만큼 입니다. Widget 자체의 padding은 Widget 내에 적용됩니다.
boxPackEnd 로 추가된 Widget이 있다면 바로 앞 위치에 추가 됩니다.
createBox로 생성한 Box 컨테이너 위젯입니다.
ui::kOrientationVertical 방향으로 배치할 경우, 높이를 확장합니다.. ui::kOrientationHorizontal 방향으로 배치할 경우, 너비를 확장합니다. 여러 개의 자식 위젯의 expand 특성이 true인 경우, 그러한 자식 위젯들끼리 크기에 비례하여 확장됩니다.
ui::kOrientationVertical 방향으로 배치할 경우, 높이를 채웁니다. ui::kOrientationHorizontal 방향으로 배치할 경우, 너비를 채웁니다. fill이 false인 경우, Widget의 Align 특성 값에 맞게 배치됩니다. expand가 true 인 경우에만 적용됩니다.
padding 값을 합한 만큼 입니다. Widget 자체의 padding은 Widget 내에 적용됩니다.
Fixed Container#
Fixed 컨테이너 위젯은 자식 위젯들을 고정 위치에 배치합니다.
createFixed로 생성한 Fixed 컨테이너 위젯입니다.
Grid Container#
Grid 컨테이너 위젯은 행과 열을 기준으로 자식 위젯을 배치합니다.
createGrid로 생성한 Grid 컨테이너 위젯입니다.
Single Container#
createWindow, createDialog, createButton 등으로 생성됩니다.
ListBox Container#
ListBox 컨테이너 위젯은 스크롤 가능한 컨테이너로 자식 위젯을 배치합니다.
ui::kListBoxFixedItemSize 나 ui::kListBoxDynamicItemSize 값 중 하나를 지정합니다.
createListBox로 생성된 ListBox 컨테이너 위젯 객체입니다.
createListBox로 생성된 ListBox 컨테이너 위젯 객체입니다.
createListBox로 생성된 ListBox 컨테이너 위젯 객체입니다.
createListBox로 생성된 ListBox 컨테이너 위젯 객체입니다.
createListBox로 생성된 ListBox 컨테이너 위젯 객체입니다.
createListBox로 생성된 ListBox 컨테이너 위젯 객체입니다.
Window#
showWindow 등을 호출하여 화면에 보이게 합니다.
createWindow로 생성한 Window 객체입니다.
createWindow로 생성한 Window 객체입니다.
- 0: 성공
- -1: 실패
createWindow로 생성한 Window 객체입니다.
- 0: 성공
- -1: 실패
Dialog#
createDialog로 생성한 Dialog 객체입니다.
createDialog로 생성한 Dialog 객체입니다.
createDialog로 생성한 Dialog 객체입니다.
createDialog로 생성한 Dialog 객체입니다.
- 0: 성공
- -1: 실패
createDialog로 생성한 Dialog 객체입니다.
- 0: 성공
- -1: 실패
- 0: 성공
- -1: 실패
createDialog로 생성한 Dialog 객체입니다.
createDialog로 생성한 Dialog 객체입니다.
Button#
true이면 한 줄로 표시됩니다. false이면 여러 줄로 표시됩니다.
kOrientationVertical 이나 kOrientationHorizontal 중 한 값을 지정합니다. kOrientationVertical 이미 이미지와 텍스트가 세로 방향으로 배치되고, kOrientationHorizontal 이면 이미지와 텍스트는 가로 방향으로 배치됩니다.
true이면 텍스트가 한 줄로 표시됩니다. false이면 텍스트가 여러 줄로 표시됩니다.
- 0: 성공
- -1: 실패
- 0: 성공
- -1: 실패
- 0: 성공
- -1: 실패
Image#
OASIS_PIXEL_FORMAT_BGRA_8888 포맷이 지정됩니다. 픽셀 포맷에 대해서는 OasisTypes.h 헤더 파일을 참조합니다.
PNG 이미지 파일에서 지원되는 픽셀 포맷은 아래와 같습니다.
- OASIS_PIXEL_FORMAT_BGRA_8888
- OASIS_PIXEL_FORMAT_BGRX_8888
- OASIS_PIXEL_FORMAT_ABGR_8888
- OASIS_PIXEL_FORMAT_XBGR_8888
- OASIS_PIXEL_FORMAT_ARGB_8888
- OASIS_PIXEL_FORMAT_XRGB_8888
JPEG 이미지 파일에서 지원되는 픽셀 포맷은 아래와 같습니다.
- OASIS_PIXEL_FORMAT_BGRA_8888
- OASIS_PIXEL_FORMAT_RGBA_8888
- OASIS_PIXEL_FORMAT_ARGB_8888
- OASIS_PIXEL_FORMAT_ABGR_8888
- OASIS_PIXEL_FORMAT_XRGB_8888
- OASIS_PIXEL_FORMAT_XBGR_8888
- OASIS_PIXEL_FORMAT_RGBX_8888
- OASIS_PIXEL_FORMAT_BGRX_8888
- OASIS_PIXEL_FORMAT_RGB_888
- OASIS_PIXEL_FORMAT_BGR_888
OASIS_PIXEL_FORMAT_BGRA_8888 포맷이 지정됩니다. 픽셀 포맷에 대해서는 OasisTypes.h 헤더 파일을 참조합니다.
- 0: 성공
- -1: 실패
- 0: 성공
- -1: 실패
- 0: 성공
- -1: 실패
- 0: 성공
- -1: 실패
- 0: 성공
- -1: 실패
- 0: 성공
- -1: 실패
Label#
- 0: 성공
- -1: 실패
Justification 값 중 하나를 입력합니다.
- 0: 성공
- -1: 실패
가로 Justification 은 아래와 같습니다.
| Justification | 값 | 설명 |
|---|---|---|
| kJustificationLeft | 0 | 왼쪽으로 정렬합니다. |
| kJustificationRight | 1 | 오른쪽으로 정렬합니다. |
| kJustificationCenter | 2 | 가운데로 정렬합니다. |
| kJustificationFill | 3 | 균등하게 정렬합니다. |
Justification 값 중 하나를 입력합니다.
- 0: 성공
- -1: 실패
세로 Justification 은 아래와 같습니다.
| Justification | 값 | 설명 |
|---|---|---|
| kJustificationTop | 0 | 위쪽으로 정렬합니다. |
| kJustificationBottom | 1 | 아래쪽으로 정렬합니다. |
| kJustificationVCenter | 2 | 세로 가운데로 정렬합니다. |
| kJustificationFill | 3 | 균등하게 정렬합니다. |
true이면 글자 단위로 자동 줄바꿈 합니다.
- 0: 성공
- -1: 실패
true이면 여러 줄이 아닌 한 줄로 렌더링합니다.
- 0: 성공
- -1: 실패
- 0: 성공
- -1: 실패
- 0: 성공
- -1: 실패
- 0: 성공
- -1: 실패
true이면 Alpha 모드가 적용되어 anti-aliasing으로 렌더링 됩니다.
Graphic Context#
Oasis는 GraphicContext 객체를 이용하여 Screen에 그리는 작업을 합니다.
하드웨어 가속이 지원될 경우, 하드웨어 가속을 사용합니다.
DrawingArea 위젯으로 그리기를 할 수 있습니다.
- 0: 성공
- -1: 실패
- 0: 성공
- -1: 실패
- 0: 성공
- -1: 실패
kTextBkModeTransparent를 지정하면 글자 배경은 투명하게 처리됩니다. kTextBkModeOpaque를 지정하면 글자 배경 색상이 적용됩니다.
- 0: 성공
- -1: 실패
drawText의 flags 값은 아래 값들을 OR'ing 합니다.
| flag | 값 |
의미 |
|---|---|---|
| DT_TOP | 0x00000000 | 글자의 세로 기준을 위쪽에 맞춥니다. |
| DT_LEFT | 0x00000000 | 글자를 왼쪽으로 정렬합니다. |
| DT_CENTER | 0x00000001 | 글자를 가운데로 맞춥니다. |
| DT_RIGHT | 0x00000002 | 글자를 오른쪽으로 정렬합니다. |
| DT_VCENTER | 0x00000004 | 글자의 세로 기준을 가운데로 맞춥니다. |
| DT_BOTTOM | 0x00000008 | 글자의 세로 기준을 아래로 맞춥니다. |
| DT_WORDBREAK | 0x00000010 | 단어 단위 줄바꿈을 허용합니다. |
| DT_SINGLELINE | 0x00000020 | 단일 줄로 처리합니다. |
| DT_CALCRECT | 0x00000400 | 문자열이 그려질 영역을 계산합니다. 실제 그리지는 않습니다. |
| DT_NOPREFIX | 0x00000800 | 문자열에 prefix 기호(&)를 처리하지 않습니다. "&abc" 인 경우, "abc"로 그려집니다. |
| DT_NOFULLWIDTHCHARBREAK | 0x00080010 | 한 글자가 허용 너비를 초과할 경우, 그 글자를 줄바꿈 없이 처리합니다. |
- 0: 성공
- -1: 실패
Drawing Area#
아래는 DrawingArea를 생성하고 그리는 예입니다.
int32_t App::create()
{
    //DrawingArea 객체를 생성합니다.
    canvas_ = ui::createDrawingArea(std::bind(&App::draw, this, std::placeholders::_1, std::placeholders::_2));
    ui::setID(canvas_, "my_drawingarea");
    ui::gridAttach(grid, canvas_, 0, 0, 1, 1);
}

void App::draw(ui::WidgetRef widget, GraphicContextRef gc)
{

    //전체를 검정색으로 칠합니다.
    Color clr_bk(255, 0, 0, 0);
    ui::fillRectangle(gc, 0, 0, width_, height_, clr_bk);

    //노란색 박스를 그립니다.
    Color clr_line(255, 255, 255, 0);
    ui::drawRectangle(gc, 10, 10, 100, 100, clr_line);

    //문자열을 그립니다.
    std::string text = "안녕하세요!";
    ui::setFont(gc, 11);
    ui::setTextForeColor(gc, Color(255, COLOR_WHITE)());
    ui::drawText(gc, str, 20, 20, 80, 80, DT_CENTER|DT_VCENTER);
}
Keypad#
아래는 키보드를 활용한 예입니다.
void cancel_handler(int sig)
{
ui::quitAllRunContexts();
got_interrupt = true;
}
int main(int argc, char *argv[])
{
int32_t err;
signal(SIGINT, cancel_handler);
oasis::key_value_map_t parameters;
parameters["offs-disable"] = "1";
if(oasis::initialize(parameters) < 0) {
DLOG(DLOG_ERROR, "Oasis init failed\n");
return -1;
}
////////////////////////////////////////////////////////////////////////////////////////////
// display setup
parameters.clear();
parameters["memory-type"] = "ion"; //cma
parameters["screen-width"] = "480";
parameters["screen-height"] = "320";
display::setup(parameters);
//////////////////////////////////////////////////////////////////////////////////////////
// ui setup
parameters.clear();
parameters["system-font-size"] = "11";
parameters["system-font-path"] = "/mnt/sd/NanumGothicCoding.ttf";
parameters["display-rotation"] = "0";
parameters["enable-touch"] = "1";
parameters["touch-cal-data-path"] = "/mnt/sd/cal.dat";
err = ui::setup(parameters);
if (err < 0) {
DLOG(DLOG_ERROR, "Oasis ui::setup failed\n");
return -1;
}
//////////////////////////////////////////////////////////////////////////////////////////
//////////////////////////////////////////////////////////////////////////////////////////
ui::ScreenRef screen = ui::getDefaultScreen();
//ASSERT(screen != nullptr);
int32_t screen_width = ui::screenWidth(screen);
int32_t screen_height = ui::screenHeight(screen);
ui::DialogRef dialog = ui::createDialog(nullptr);
ui::setBgColor(dialog, Color(255, COLOR_BLACK));
ui::setBorderSize(dialog, 0, false);
ui::BoxRef dialog_container = ui::getDialogContainerBox(dialog);
ui::setHAlign(dialog_container, ui::kAlignFill);
ui::setVAlign(dialog_container, ui::kAlignFill);
ui::setMargin(dialog_container, 0);
ui::BoxRef content_area = ui::getDialogContentArea(dialog); //horz box layout
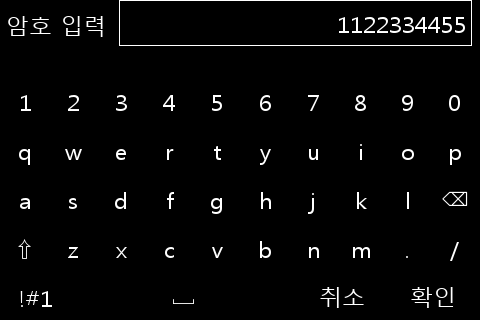
ui::KeypadRef keypad = ui::createKeypad(dialog, "암호 입력", "1122334455", "취소", "확인");
// ui::setVAlign(keypad, ui::kAlignFill);
// ui::setHAlign(keypad, ui::kAlignFill);
ui::screenAdd(screen, dialog);
std::string str = ui::showKeypad(keypad);
err = ui::runDialog(dialog);
ui::destroyDialog(dialog);
err = ui::cleanup();
oasis::finalize();
return 0;
}
응용 예에서 보여지는 키패드 화면입니다.
Timer#
source_slot_t는 아래와 같이 정의되어 있습니다.
- true: 타이머 동작을 유지합니다.
- false: 타이머를 자동으로 중지하고 제거합니다.
true이면 타이머를 활성화하고, false이면 타이머를 중지합니다.
- 0: 성공
- -1: 실패
- true: 타이머가 동작 중입니다.
- false: 타이머가 멈춰 있습니다.
- 0: 성공
- -1: 실패
아래는 1초 단위로 타이머를 발생시키는 예입니다.
// 타이머를 생성합니다.
timer_id_ = ui::timeoutAdd("tick_timer", 1000000, sig::mem_fn(*this, &App::tickTimer));
if(timer_id_ > 0) {
  //타이머를 시작합니다.
  ui::timeoutEnable(timer_id_, true);
}

bool App::tickTimer()
{
  // 타이머 작업을 합니다.

  // 타이머를 해제하려면 false를 리턴합니다.
  //return false;
  return true;
}
Signaling#
Oasis GUI 이벤트 발생과 처리는 signal-slot 메카니즘을 이용합니다.
- 0: 성공
- -1: 실패
Oasis는 아래와 같은 클릭과 터치 이벤트 처리를 위해 Signaling template을 사용합니다.
- clicked
- touch-up-event
- touch-down-event
- touch-move-event
각 이벤트 처리 함수 타입은 아래와 같습니다.
true 값을 갖습니다.아래는 Signal 연결 예입니다.
// "clicked" signal 핸들러 연결
uint32_t clicked_sigid = ui::connectSignal(apply_button, "clicked", clicked_slot_t(sig::mem_fn(*this, &App::applyButtonClicked)), 0);

// "touch-down-event" signal 핸들러 연결
uint32_t touch_down_event_sigid = ui::connectSignal(drawing_canvas, "touch-down-event", touch_down_event_slot_t(sig::mem_fn(*this, &App::touchedDown)), 0);

// "touch-up-event" signal 핸들러 연결
uint32_t touch_up_event_sigid = ui::connectSignal(drawing_canvas, "touch-up-event", touch_up_event_slot_t(sig::mem_fn(*this, &App::touchedUp)), 0);

// "touch-move-event" signal 핸들러 연결
uint32_t touch_move_event_sigid = ui::connectSignal(drawing_canvas, "touch-move-event", touch_move_event_slot_t(sig::mem_fn(*this, &App::touchedMove)), 0);
Running Context#
Oasis는 이벤트 처리를 위해 RunningLoop를 이용합니다. RunningLoop는 RunnContext를 가지고 있습니다.
응용프로그램을 SIGINT 등 신호 처리기에서 강제 종료하고자 할 때 사용합니다.